Iron Harvest DevBlog #3 - July 2018
Cover & Destruction, Designing Mechs
- News: Behind-the-scenes, Unite Berlin, Alpha 1
- Gameplay Spotlight: Cover & Destruction
- Behind-the-Scenes: Designing Mechs
- Look Ahead: Alpha 1 coming next month!
This month: “Behind-the-Scenes” instead of “Team Spotlight”
Welcome to our 3rd Iron Harvest DevBlog!
Originally, our plan was to have a chat with our 3D Character Artists about how they design units for the game. But in reality, there are many different people contributing to the design of a character, a mech or a prop: 3D Artists, Concept Artists, Game Designers, Technical Artists, Animators… they all give their input to make this stuff work.
So, instead of focussing on one group of people, we decided to give you a peek into the whole process and show you how we design a mech from start to finish in this blog’s Behind-the-Scenes: Designing Mechs section.
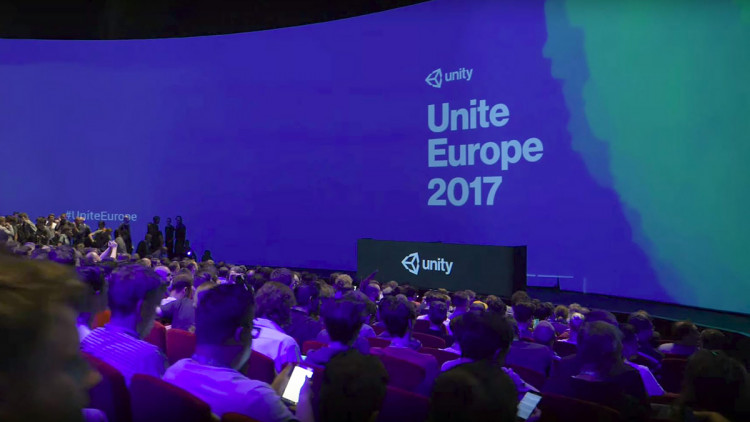
Iron Harvest @ Unite, Berlin
Three of our senior developers visited Unite in Berlin, Germany. Unite is a conference by Unity Technologies, developers of the Unity engine, the software we use to power Iron Harvest. We had very interesting and promising discussions with people from Unity, 3rd party technology providers and other developers about – among other things – multiplayer/networking and editor/mod support. We still can’t promise anything regarding the latter, but we are definitely on it!
It was very motivating for us to see how many people knew about Iron Harvest and experience the overall excitement for the game. There is a good chance Unity will feature Iron Harvest as one of their “Made with Unity” reference titles in the future. Fingers crossed!
Iron Harvest Mailing List
If you haven‘t backed/pre-ordered Iron Harvest yet, be sure to join our mailing list to receive a notification as soon as a new DevBlog is available.
In our Gameplay Spotlights, we go into more detail regarding gameplay features of Iron Harvest. However, please note that since we are still in development, features might obviously change or could even be removed from the game entirely. Your feedback and thoughts are very welcome, as always!
Why implement a cover system?
During our initial game design discussions more than two years ago, we set on the decision to introduce a sophisticated cover system in Iron Harvest.
As most of you already know, we are very keen on creating an RTS game in which your strategy and tactical approach is more important than your ability to make split second decisions and give orders in breath-taking speed.
A cover feature allows you to send your infantry squads into relative safety, at least for a certain amount of time. That gives you the opportunity to take a breath, formulate a plan and focus on other tasks on the battlefield.
Apart from decelerating gameplay, the cover system in Iron Harvest also provides an extra layer of tactical depth. Not all units can use cover, some units can build cover and some are more effective than others to destroy it… While a light mech might win against a grenadier infantry squad in open field, the infantry might win when there is cover that mechs can’t destroy fast enough.
To sum it all up: we are developing a cover system with the intention of minimizing hectic gameplay, while simultaneously offering more tactical options to players.
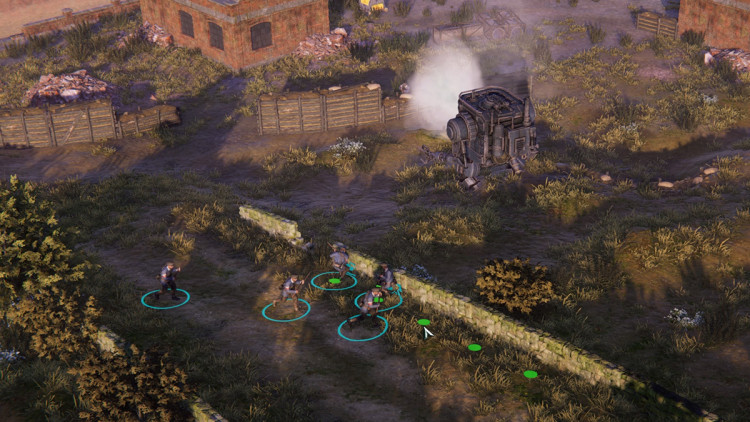
Getting into cover
There are two approaches to make use of cover in Iron Harvest. You can explicitly order infantry squads to make use of cover, for instance behind a wall or in trenches. There is clear visual feedback where the selected squad and each of its members will take cover, even before you give the order to move. Your soldiers will move into cover and – if it’s low cover – will attack from behind it if possible.
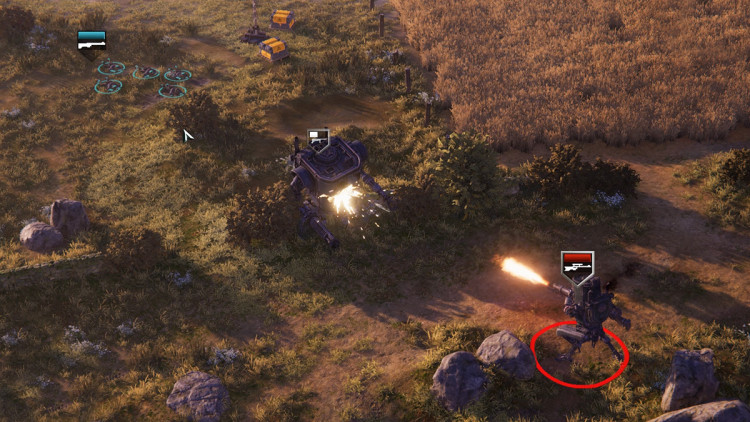
However, you don’t have to send your units into massive cover to get an advantage. If you keep, for example, one of your mechs between your soldiers and the enemy, some of your men will be protected by the mech, because we calculate each bullet in the game and the enemy units can’t just shoot through a giant mech to get to the soldiers in its shadow.
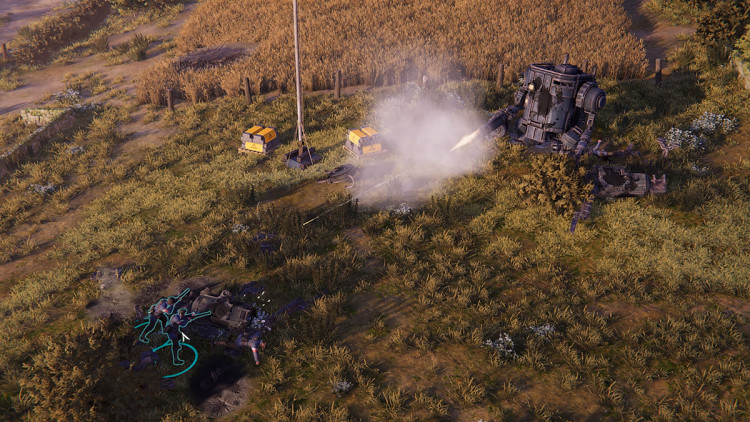
Destructible environment = Dynamic cover
Most objects and structures that are providing cover in Iron Harvest can be destroyed, which means the battlefield is constantly changing. Enemy troops are hiding in a building? Take one of your massive mechs and just blast the structure to pieces or walk right through it. Be careful, though! Even a destroyed building can provide plenty of cover. Each remaining wall is a perfectly suitable cover for infantry units.
If there is no structural cover, maybe there are destroyed mechs? Mech remains are great cover spots for your infantry. And if there is absolutely no cover nearby, just order your engineers to build sandbag barriers.
Technology
We started working on our destruction system early on, because we thought something spectacular might help us garner attention (and we think it worked). Our destruction system is very advanced, pretty likely one of the best systems out there. You can see it in action here:


Wrap Up
We hope the intention behind our design approach has become clear. We are certain that the dynamic cover system will make for very exciting and always different battles. You’ll constantly have to adjust your strategy, based on the changes to the battlefield you and your enemies will cause.
In the Behind-the-Scenes section we’re giving you a glimpse at how we design assets and develop features for Iron Harvest. It’s a highly iterative process, involving many people.
One of the main attractions of the world of 1920+ that immediately grabbed our attention and made us want to develop Iron Harvest in the first place were the mechs that Jakub Rozalski had created. Getting these World War 1 inspired diesel-punk monsters to look and feel right in the game is an ongoing challenge.
Challenges in designing a mech
Jakub is an artist, a painter, a storyteller and his creations are just awesome to work with. However, game creation and what is needed for a game to make it work and feel great is a different beast. We want Jakub’s creations to look impressive and stay true to his world, but gameplay always comes first.
All mechs need to meet certain criteria put forth by our game designers, for example when it comes to movement speed or weaponry. They also need to be able to do a wide range of movements and animations, all without stretching or bending metal parts.
It’s basically impossible to get all the mechanics of these complex machines right while designing them in 2D. So we came up with a process that helps us find problems early on and keeps the development time of a unit relatively short (e.g. a couple of weeks for each unit), while at the same time guaranteeing quality results.
This is our design process:
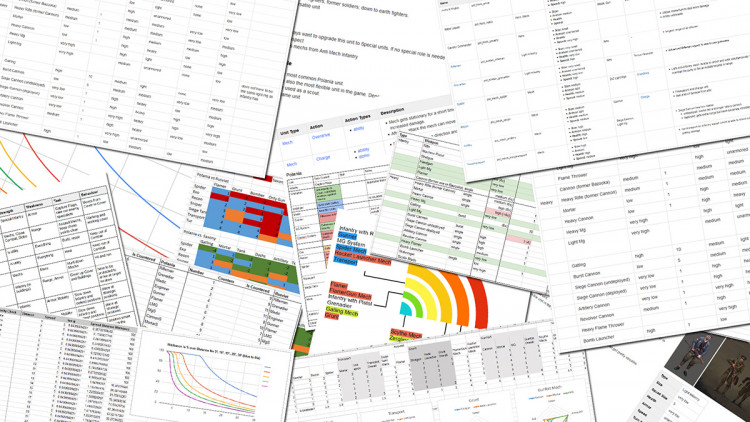
Step 1: Game Design & Story
We are Germans, so we start out with a plan. ;-)
Each unit in the game has to fulfil at least one role. For example, there are units that are very effective against infantry or light to medium armoured mechs or against buildings. Some units are fast, others have a great combat range or can do some sort of crowd control. Each faction needs units for all roles that we need, in order to facilitate all sorts of different tactics and playstyles.
Furthermore, each faction in the game has a unique profile. We ask ourselves, what kind of mechs would fit well with each faction and in which role? What makes sense from a story and lore perspective? What looks and feels right?
Therefore, before we do anything else, we think about all the different units a faction could have and what they need to have, and then try to find the right mix. Then we describe each unit, talk about its role and characteristics and how we want it to feel in the game. The result is a big plan that looks good on paper… but now we have to actually start designing.
Step 2: 3D Blockouts
In game development, you usually start with a 2D concept at this point. However, because of the extra layer of complexity regarding mech mechanics, we actually start in 3D.
First, we create a rough blockout* of the mech in order to find out early on, if its role is communicated well. We want players to understand a mech’s purpose, behaviour and combat style just by looking at it. We also try to make mechs look as unique as possible, to make sure that your chances to confuse a mech with another type of mech are slim.
As you can imagine, this phase includes lots of iterations and only when the team is really happy and convinced with the early version, the mech development will go on to the next step.
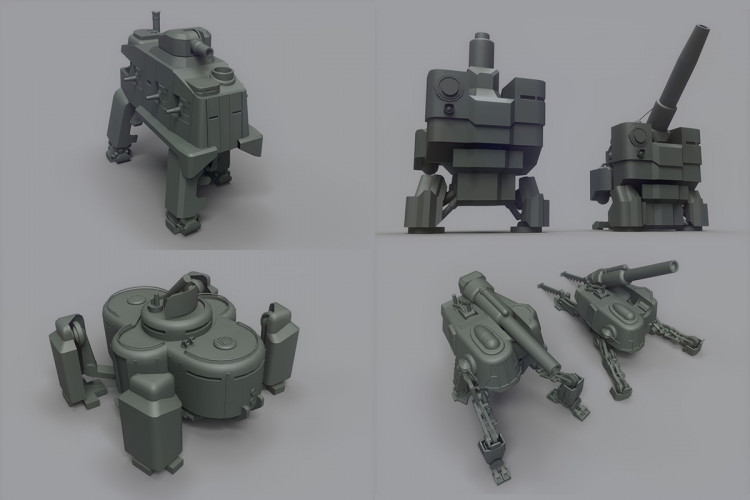
* As you can see on the screenshot, the easiest way to think of a so-called blockout is as an arrangement of simple grey 3D shapes. It gives an idea of the scale of the unit and can reflect its functions, but does not show any detail yet.
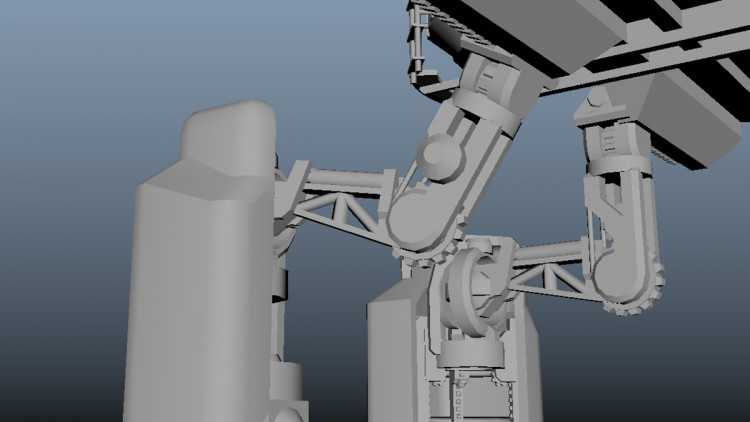
Step 3: Rigging & Test Animations
As soon as the 3D blockout is done, we start adding controllers to the model that enable us to do some test animations. That is the main reason why we start with a 3D model instead of a 2d artwork.
A mech in Iron Harvest must be able to perform rather complex and varied movements – like walking in one direction while rotating the upper body parts and shooting in different directions. All mechs have special abilities that might need complex animations and some of them are capable of melee combat as well. Moreover, all these animations need to communicate weight and size.
When animating human characters, it is easier to “cheat” here and there. You can squeeze a body part or rotate it a bit further than in reality. But you can’t really do that when you work with pistons, gears and metal.
As soon as our technical artists and animators are happy, we put this version of the unit into the game as a placeholder. This allows us to test units and do some basic balancing long before the final asset is ready.
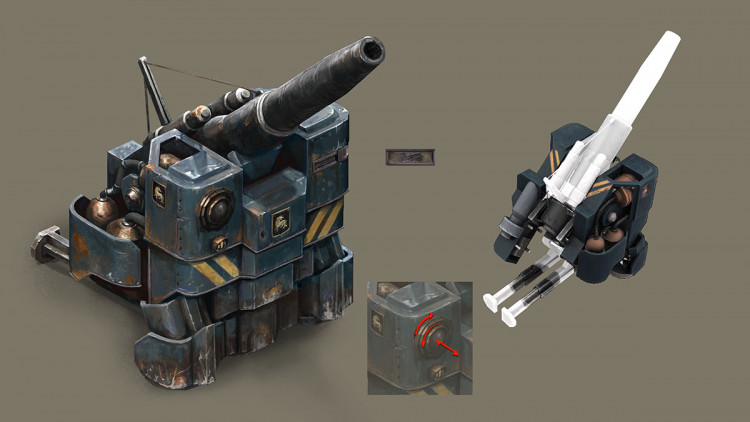
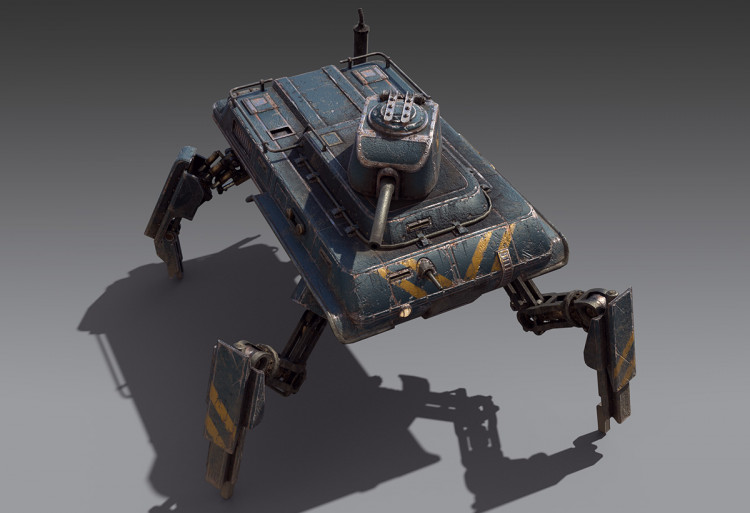
Step 4: Concept Art
The final 3D blockout is now being rendered from various angles and our concept artists paint over these images, in order to fill them with all the details, materials, colors, signs, screws, inscriptions, etc.
The resulting concept art is the definite template for creating the final, textured and animated 3D mech.
Step 5: Modelling
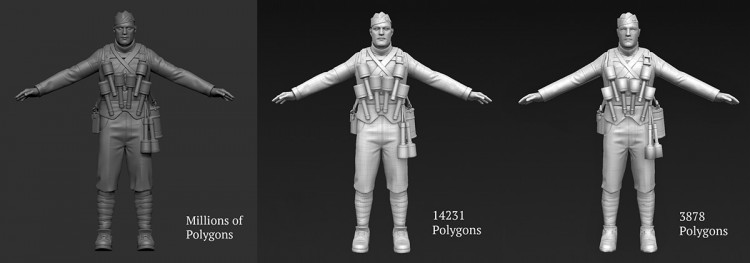
In the next step, the mech gets modelled in zBrush – a genius digital sculpting tool. This model will be super high-poly and extremely detailed. Every tiniest screw on a mech will be visible and the model will consist of millions and millions of polygons, thus making it unusable for the game itself.
The next step is to reduce the number of polygons to tens of thousands without losing a lot of visual information. This “midpoly” version will be used for cutscenes and close-up sequences in the game.
For the game itself, where we want to see dozens of units and buildings at the same time, an even further reduced version is created, with a couple thousand polygons.
Step 6: Texturing
Time has finally come to add colors, materials and details onto the model that are unique to the mech’s faction. Similar to the modelling step, we always create two versions. One will serve in situations that need to show extreme detail and the other will serve as an ingame version, where the camera never gets too close to a mech.
Step 7: Rigging, Skinning
During the 7th production step, the all the needed mechanisms will be added to the model of the mech. The blockout version only had joints and controllers needed for the rough test animation, but now it is getting detailed. Everything that might be visible in any cutscene or gameplay situation and that needs some sort of animation, gets rigged.
We’re also making use of IK (inverse kinematics). IKs enable the game to basically change animations on-the-fly. For example, the mechs have to traverse rough, sometimes bumpy terrain, rubble and so on. Thanks to IK, they can keep their feet on the ground at all times, even when their walk cycle has been animated for a flat surface
Step 8: Animating
During this step, every movement a mech needs to be able to do, is being designed and created. This results in many dozens of different animations for each mech.
The Animation Controller defines the smooth blending/transition of animations. When a mech launches a charge attack against an enemy, it will go from its standing position into a walk animation and from there, smoothly into a run animation. You won’t sense how different animation are being blended together, everything will feel fluent and real (hopefully).
Furthermore, it is very important for our artists that the animations add to the characteristics a mech has (or should have). A lot of the size and weight of a unit is communicated through movement.
While all of this is happening on the content creation side, our game designers set up and balance the blockout version as best as possible. All the necessary meta info, like health, armor values, resource costs, building time and many more, are set up and “attached” to the unit.
As soon as the animated 3D asset is ready, we throw out the blockout version and replace it with the much prettier final version.
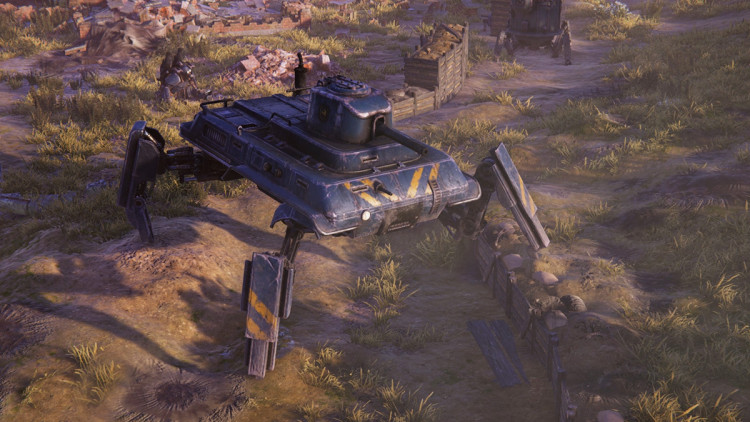
Step 10: Effects
In this exciting step, all the spectacular effects are being attached to the model. Muzzle flashes, smoke from exhaust pipes, parts that will fly through the air when the unit is hit or destroyed… all that good stuff.
Visually, the unit is finished at this point.

Step 11: Sound Effects
As soon as we have the final model, the final animations and the final effects, we can start working on the audio effects. As with the animations, it’s all about selling the unit and giving it character. You can make a unit or weapon make feel bigger or smaller, more or less powerful, more dynamic or slower just with audio.
If we do our job right, all these different elements pull a unit into the same direction and contribute to one consistent vision.
Step 12: Balancing & Adjustments
The final step is certainly the longest one. Over months and months, until the release of the game and most probably even after release, we’ll continue to balance and polish the units.
Gameplay comes first. Always. Even if we have the coolest looking, bad-ass sounding and most beautifully animated mech… if it doesn’t work from a gameplay perspective, it has to go.
We hope you got a little bit of insight into how we design the 30 or so mechs/exo-skeletons of Iron Harvest. At this point in development, we’re still working on getting all units into the game as blockouts. We can’t wait to get all units ready for testing and receiving your feedback!
We are working hard on the “First Look” Alpha 1 demo. The demo is scheduled for the first half of August and will give you all a first glimpse into the game.
It will feature a reworked version of the challenge map you might have already seen during the Kickstarter (adding two new mechs, two new infantry units and the first two battlefield weapon systems), hopefully a brand new second challenge map, the first skirmish map and the next iteration of our user interface.
Our next DevBlog will exclusively deal with Alpha 1, what’s in it and where to get it.
To never miss an Iron Harvest DevBlog update, like us on Facebook or Twitter, or join our Mailing List.
© 2026 KING Art GmbH. All rights reserved.